

How to Remove the Image Background in CapCut 2026
You can remove the image background in CapCut using two of the best methods available. In this article, we provide complete details on how to remove an image background step by step.
How to Remove the Image Background in CapCut 2026
Are you excited to make your photos look more attractive than before? If yes, then changing or removing the image background is the best option. Today, background removal is no longer difficult because you can easily do it using CapCut pro.
CapCut allows you to remove the image background with two effective methods. Below, we explain both methods in detail so you can follow each step easily and remove backgrounds without any hassle.
Why to Remove the Background Image?
Removing an image background can be challenging, especially when the background is distracting or cluttered. Whether for personal or professional use, extracting the main subject is important. CapCut is a reliable online photo editor that helps remove image backgrounds quickly and at no cost.
There are mainly two reasons to remove an image background in CapCut pro:
Transparent PNGs
Once the background is removed, the image can be saved as a transparent PNG, which is useful for overlays, thumbnails, and designs.
Enhance Aesthetics
By removing unnecessary background elements, the focus remains entirely on the subject, making the image more clean and professional.
2 Best Methods to Remove the Image Background in CapCut 2026
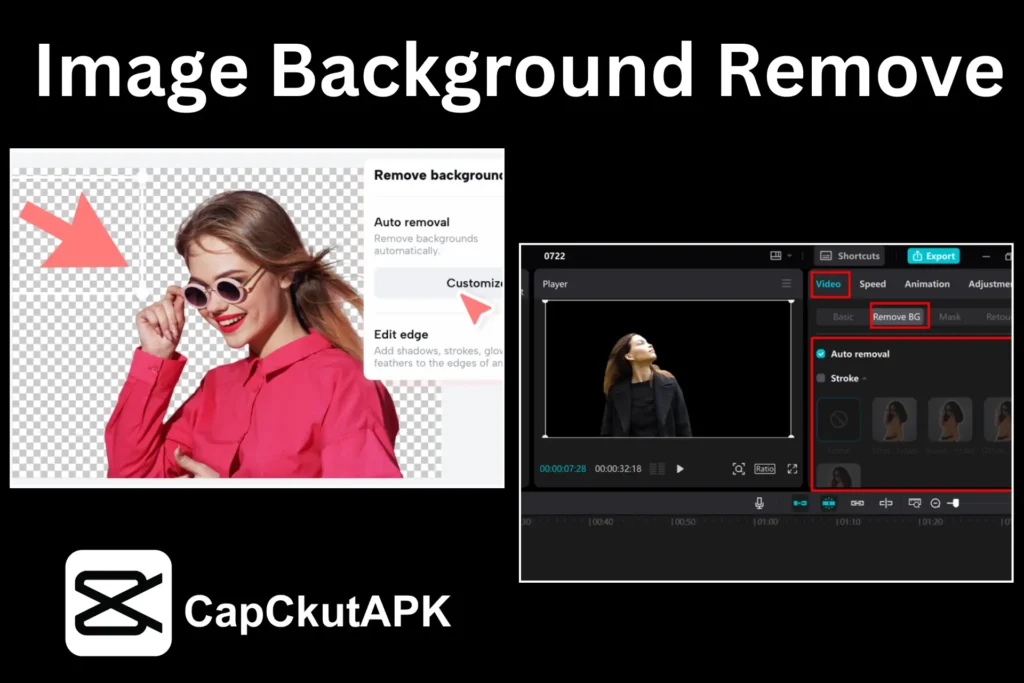
Method 1: Using the Background Remover Option in CapCut
- Open the CapCut editing application.
- Select the option to remove the background of an image.
- Access your gallery and choose the image.
- Click the add button to import the image into CapCut.
- Within a few seconds, CapCut will automatically remove the background.
- Two options will appear: export the image or explore more options.
- If you want to change the background color, click on the background color option.
- Select your preferred color from the available options.
- Finally, export the edited image and check it in your device gallery.

Tips for Perfect Background Removal:
- Use high-quality images for better results.
- Maintain good contrast between the subject and background.
- Always review the image before exporting.
Method 2: Using Chroma Key
- Start a new project and import the image into CapCut.
- Tap on the image to access the Chroma Key tool.
- Select and remove the background color.
- Use feather and shadow tools to refine the edges.
- Save and export the image after final adjustments.
More Alternatives to Remove an Image Background
- Canva Pro: Import the image and select the Background Remover option to remove the background instantly.
- Adobe Photoshop: Use the Layer Mask feature to quickly remove image backgrounds.
- PicsArt App: Select an image and tap on Remove BG. The AI tool will automatically extract the background.
Conclusion
Removing or changing an image background has become simple with CapCut. In this article, we explained how to remove the image background using easy methods. Background-free images are more versatile and suitable for various purposes.
CapCut’s background removal tool improves image quality and allows you to use photos for personal, professional, and creative projects with ease.